


Getting new fish or invertebrates is always an exciting moment for any aquarium keeper, but doing it correctly is important to reduce the amount of stress the animals experience. Alex details a simple guide on how to acclimate them to their new tank.
How to acclimatise new inhabitants
You have picked out the fish you want, checked that all the animals in the tank (yes even those that are a different species) are healthy, it is now time to ask for assistance from the store staff. Once they’ve been bagged up for you and you’ve paid for them- perhaps keeping the actual price of them to yourself- it is time to take them home and add them to their lovely new home.
After you have made the journey home, everything should be done to ensure they have a stress-free transition to your tank. After being in the dark while travelling, the fish should be kept in fairly dark conditions, and not blinded by tank lighting, so switch these off! If they are already off, but are controlled by a timer, it is worth double checking that they are not due to switch on any time soon.
(Photo by Shutterstock)
Light and temperature acclimation
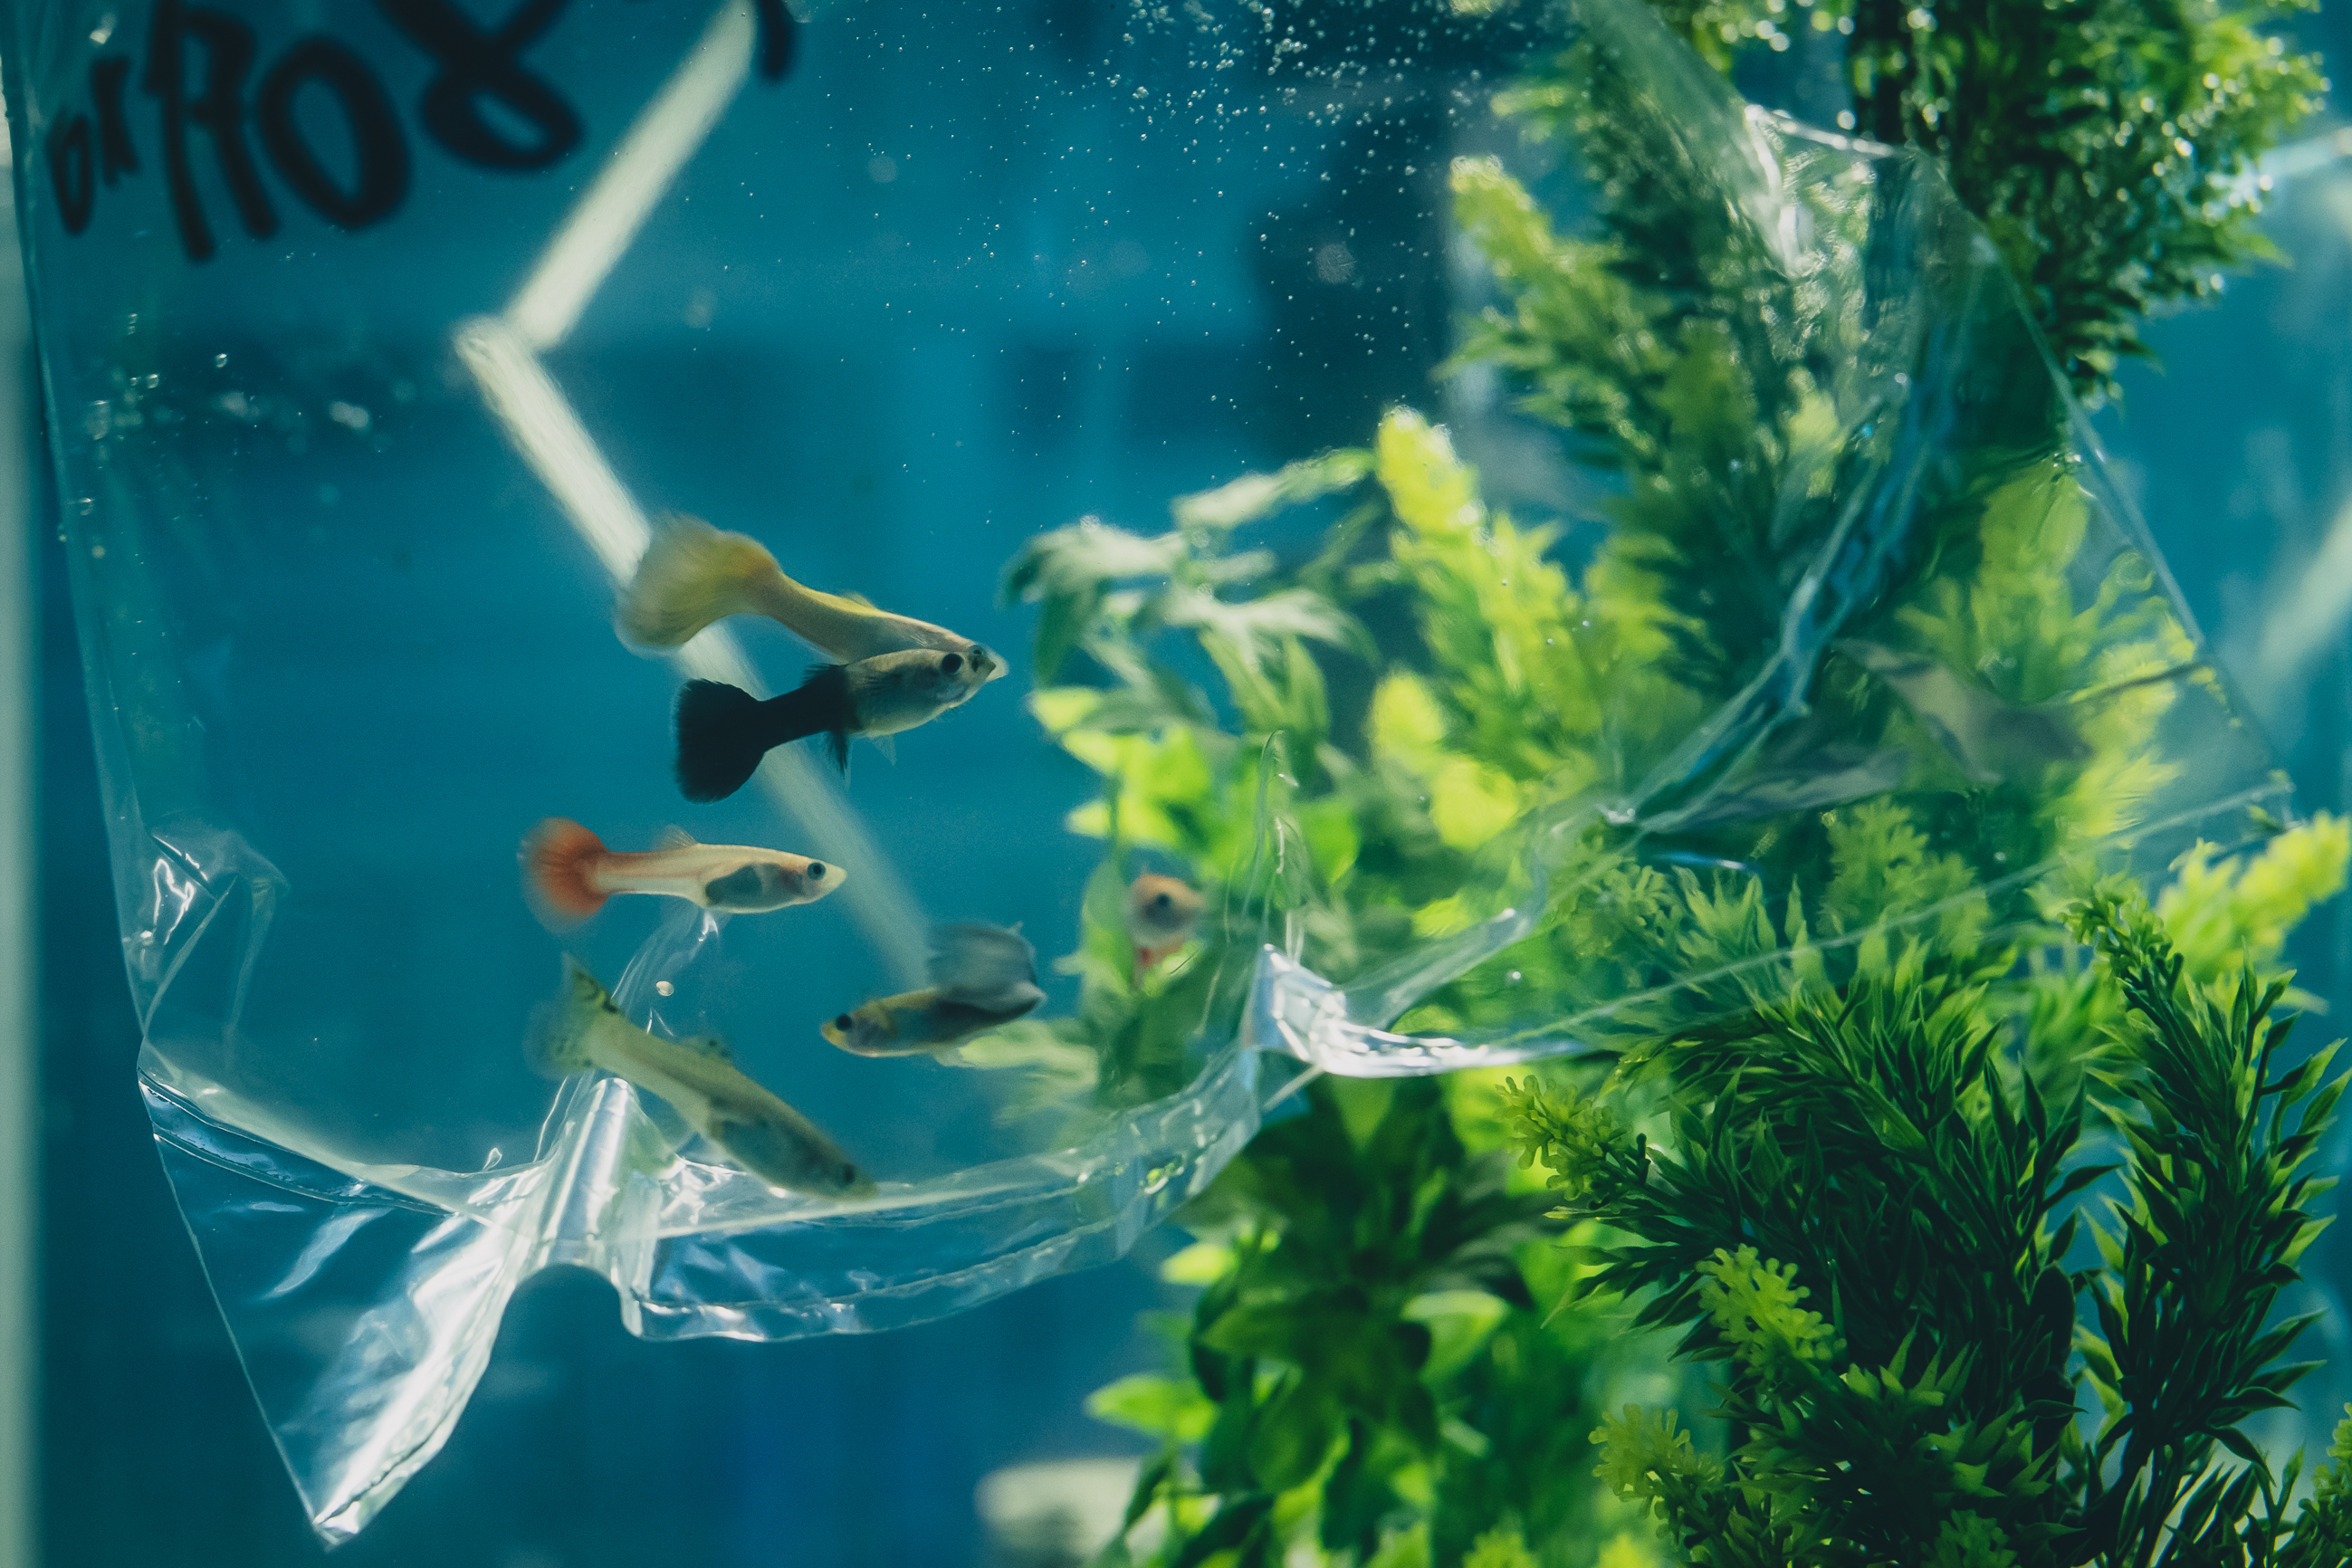
Now the lights are off you can float the unopened bags on the surface of the water. If there are many bags, or the tank is filled to the rim, lower the aquarium’s water level so that the bags do not cause it to overflow. Floating the bags will let the fish slowly acclimate to the ambient lighting and allow the temperate of the water inside the bag to slowly match the water of their new home, the time it takes will vary depending on the difference between the starting temperatures. At this point it is a good idea to just check the health of the fish and ensure they have not deteriorated during the journey. From here, there are a few different methods on how best to go about the rest of the process.
Float acclimation for new fish
The method I hear most often explained in aquariums stores is the float acclimation. This is when the bag of new inhabitants is floated on the surface of the water and small amounts of water is manually added to the bag from the aquarium. This is a very easy way of acclimatising your latest purchase and requires very little equipment other than a net and a small jug or beaker (which you likely already have).
6 easy steps for float acclimation
- Undo the bag or cut the knot off and roll down the sides to make a floating collar.
- Gently introduce some tank water to the bag using a small jug or beaker.
- Repeat this every few minutes until the bag contains more water from your aquarium than the shop. This could take anywhere from 30-60 minutes.
- Once completed, the water parameters in the bag should match closely with that of your aquarium. Optional: If you have a TDS pen or similar you can quickly check this by ensuring both the bag and tank have a very similar reading.
- Next catch the new arrivals in a small net from the bag and release into the tank. You may wish to pour them out through a large net if you struggle to catch them from within the bag. Note: the transport water could have waste, pest snail eggs and all sorts of other things in, so it is good practice not to pour the contents of the whole bag into your aquarium.
- Immediately after, double check the bag, the floor and the net to ensure no fish have got stuck or jumped out along the way.
 Caridina shrimp are very sensitive to changes in water chemistry, drip acclimation is often the best method for species like this. (Photo by Shutterstock)
Beginners guide to drip acclimation for shrimp and other sensitive aquarium inhabitants
Drip acclimation is another common method used by aquarists often that have a little more experience. It is a longer process but allows for a more gradual change in water chemistry ideal for sensitive species like Caridina shrimp, corals and some specialist fish. As it is a slightly more complicated method, we have also produced a video guide to drip acclimation which should help you with every step. The whole process is likely to take a couple of hours.

TDS pens or meters can be really useful when acclimating new arrivals! (Photo by Shutterstock)
What equipment is required for drip acclimatising?
- Airline hose
- Method of flow restriction (a small tap or clamp) Optional
- Small dark bucket or jug
- 2 clips
- TDS pen
- A small net
Simple steps for drip acclimation
- After temperature acclimatising the new arrivals, open the bag and slowly pour the contents into the small bucket or jug.
- Attach, using a clip, one end of the airline to your aquarium with the opening a few inches underwater. Start a siphon by either pushing the airline into the filer outflow to force water into it, or by gently sucking on the opposite end. Airlines are often clear so you can see where the water is and ensure you do not end up with any in your mouth. Starting a siphon with your mouth is not the most hygienic method but is utilised by many hobbyists.
- Using your choice of restricting the flow, you can simply tie a knot in the hosing, tighten it until it is dripping at 1-2 drips per second.
- Attach the lower end using the second clip to the bucket/jug.
- Check the TDS of the water in both your aquarium and the bucket, use the difference between the two to estimate how long you will be acclimatising the animals for, there is no exact science for this but as you gain experience you will get better at it.
- Now we wait, regularly popping to the aquarium to check: the water level of the aquarium to ensure things like the heater and filter are still submerged, the bucket is not overflowing, the animals do not look stressed and the TDS of the bucket water and adjust the drip rate if the change in TDS is either too fast or slow.
- Once the two waters have very similar TDS it is time to stop the siphon (carefully as the hosing will stay full of water until it has drained out) and transfer the new aquatic creatures to the tank using the small net.
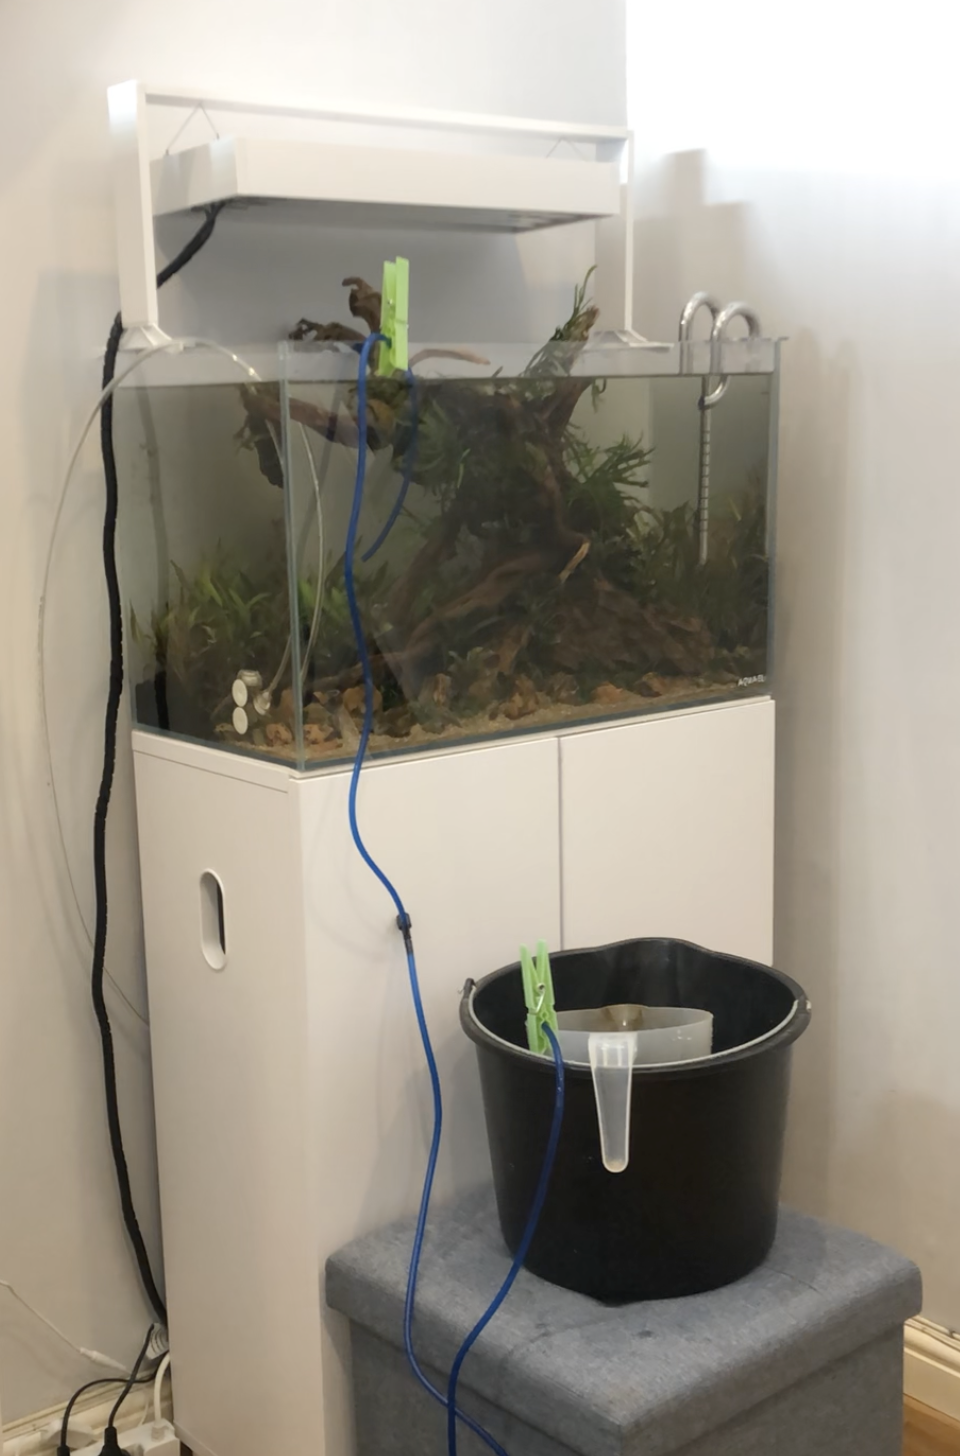
A simple set up for drip acclimation
Helping the fish or shrimp settle in
Once in the tank, the new arrivals will likely find shelter and hide while they get used to their new surroundings and tank mates. Give it an hour or two before you turn the lights back on, but if you can it is worth peering into the dark aquarium to make sure any existing inhabitants are not bullying, or worse predating on, the new arrivals.
Adding some food when you introduce new fish can help, as the existing residents will be too preoccupied with the food to notice, or single out, the newcomers. If there is a risk of the new fish being bite size this may encourage other fish to see the new arrivals as a snack. You will need to use your judgement here but typically I would recommend growing on the new fish to ensure they are far too big to fit in anyone’s mouth in a separate aquarium first rather than risking this. Don’t be surprised if it takes a day or two for the new arrivals to begin to feed, but if they continue to not feed you may need to switch up the food you are offering.
Alternative options for long transport
If you have ordered your fish online or purchased them a long way from your home there are a few additional things you need to check
- Online sellers often have a Dead On Arrival guarantee, should you see any issues take photos before opening the bag and send these to them ASAP.
- Ammonia levels can increase due to fish waste and pH can drop due to increased CO2. This can create a ticking time bomb if you were to acclimate the fish slowly as outlined above. Instead transfer the fish out of the bag into your tank immediately after temperature acclimation. Or, alternatively, you can add an ammonia detoxifier like SeaChem Prime to the bag and follow normal procedures.
- Utilising a quarantine or hospital tank is always advisable no matter where you source your fish. But ordering online means you did not get chance to check their health before purchasing and so it becomes even more important here. Quarantine tanks can be simple and affordable and we have a simple guide to help you with everything you need.
For more information and useful guides on acclimation for fish, or useful guides on how to help your fish settle in, check out our latest magazine subscription offers or visit our Fishkeeping FAQ section.