


When Jeremy Gay persuaded a PFK photographer to finally upgrade his reef tank, it was with the proviso that he helped out with the new one.
If there was one bit of advice I could offer to any reef tank owner, I would say be patient. PFK’s resident photographer Neil Hepworth first got into marines nearly ten years ago, and in that time he has continually run just the one tank.
I helped Neil out with his first tank too, because when he took up reefkeeping he had not kept fish before. It was a 1.2m/4' tank with a wooden cabinet and hood, and I specced it out with a combination of spare electrical goods and purchased products. The tank wasn’t drilled to connect up to a sump, and back then it was an issue just finding a protein skimmer that would fit on such a tank with both a box hood and glass bracing bars.
The initial set-up ran as a basic Berlin system with lots of good quality live rock, powerheads, fluorescent lighting and a protein skimmer. My initial advice was to have just soft corals but within a few years that same tank was home to both LPS and SPS corals. This was achieved without a calcium reactor or supplements, but thanks to Neil’s diligence to water changes and maintenance.
Make no mistake though, that set-up was not without its problems. There were several large wipe outs of corals and fish, many still unexplained to this day, and years of salt spray from the skimmer meant that much of the back of the wooden hood eventually disintegrated.
So, nearly ten years and two house moves later, we were out on a Shoptour, steered cleverly by me to include a tank manufacturer, and Neil eventually agreed to buy a new tank.

Time for a change
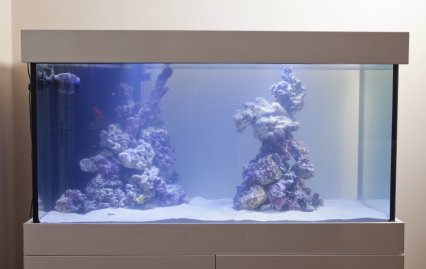
Tank fashions have changed quite a bit in ten years, and this time Neil wanted to change the smooth woodgrain of his polished aquarium for the clean lines of a modern-looking gloss white cabinet. I tried to get him to buy a rimless, open-topped aquarium like the one I was planning for myself, but Neil opted for an open-topped pelmet instead. I quizzed the tank builders as to options for the pelmet, because if you make it too high the tank can look top heavy, clumsy and even dated.
We got the pelmet height down to 100mm instead of the usual 150mm or more, and for the cabinet design itself we opted for minimalist design with push open doors, no handles and a very clean, Japanese style.
The sump
Marine equipment can look very daunting and nothing is more scary to the inexperienced fishkeeper than a sump tank. It took me years to convince Neil that sumps were better for reef tanks and that, if you do it right, they don’t flood. He wasn’t so sure, but I gave him my guarantee that I would design and build his new tank as if it were my own and that I would run him through what happens in a powercut when we set the tank up. He eventually agreed.
The cabinet was 120 x 75 x 60cm/47.2 x 29.5 x 23.6” so had lots of room for a sump, and I made sure that three large holes were drilled in the back for ventilation. The sump, I told the builder, I wanted to be 91.4 x 45.7 x 45.7cm/3’ x 18” x 18” with three chambers: one 30.4cm/12” chamber to house a nice big protein skimmer, one 45.7cm/18” chamber after that to act as an algae refugium and deep sand bed, and a 15.2cm/6” chamber after that for return pump.
The cabinet and sump were also large enough to include a calcium reactor, phosphate reactor or pellet reactor and an automatic top-up, but Neil felt that the sump and refugium were about as far an evolutionary step as he wanted to take — for now anyway!
The weir
I’d played about with quite a few sumps and weirs by the time I helped Neil out with his, so I was pretty clear on what I wanted: a corner weir, ideally square or rectangular, in black, with both top and bottom scavenging weirs to drag water from the surface and from the substrate at the same time.
I also wanted three holes drilled in the base of the corner weir — one for an outlet pipe, one for an inlet pipe and a spare outlet pipe to prevent accidental flooding. I also specified that I wanted room to make one into a 'durso' using 90 degree elbows, and if you ever want to, you could even ask for a fourth hole and pipework to run the pump’s power cables down into the cabinet from the main display tank. The tank builder said they did triangular not rectangular weirs, but they could do everything else I requested.
We could have ordered the bulkheads and pipework from elsewhere, but with there being both metric and imperial pipe fittings and hole cutters out there, one way of ensuring that the manufacturer would drill the right size holes was to get him to supply the fittings too.
Moving tanks
One of the most frequently asked questions of the PFK team is how to move tanks. This was Neil’s predicament too, only there was lots of space around it. The tanks were positioned next to each other for the changeover. I supplied lots of empty RO drums, we siphoned as much tankwater as we could in a short time, briefly exposing both rock and corals, and then pushed the old tank out of the way.
Thanks to Neil’s oak floor we just about managed to get some carpet under the cabinet to make sliding it easier, and within five minutes we had turned off, siphoned, slid, filled up and turned back on again, and both fish and corals were none the worse for the experience. That bought us infinite amounts of time to put the new tank in its place and plumb-in and glue the pipe fittings.
Prepping
My plan was to do the whole changeover within the space of a day. The original tank had a gross volume of about 200 l/43.9 gal, yet the new tank and sump held over 500 l/ 109.9 gal. Neil had an RO unit so I advised him to collect at least 12 drums worth of pure RO before putting it into the pond tub that I lent him, with heaters, circulation pump and airstone to mix up 300 l/ 65.9 gal of salt.
Once mixed he could then pump the saltwater into the 12 drums (hired from an aquatic shop), store them inside the house in the warm and then he would be ready to go on the day of the changeover.
We also made sure we had plenty of buckets, towels, siphon tubes, a new larger heater, a plastic tub to put all the rock and corals into and that no one else would be in the house, or in the way, on that day. I advised Neil to cut feeding down in the days up to the move and for a few days afterwards to cut down waste produced.
Changeover day
With the sump plumbed in and the pipe cement cured in the new tank, it was time to move everything over. My plan was to make the move as seamless as possible by moving all the rock, all the substrate and as much of the water from the old tank as we could.
We placed a black plastic Laguna pond tub on the living room floor and proceeded to move what live rock pieces we could into it. As the water got deeper in the tub, the corals could go in and then the rest of the rock, leaving the old tank clear of décor so we could catch the fish. The fish went into the tub too, along with the old powerheads and heater. Although not lit, this tub would now be perfectly biologically stable for as long as we needed it to be.
The old tank substrate I opted to put into the new tank sump was part sand bed and part biological starter colony. This would move many critters over as well as beneficial bacteria.
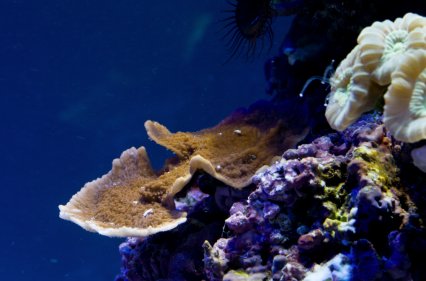
The old tank had the now dated rock-wall look, with all the rock being stacked up against the back. From what he had seen in some of the tanks he had photographed, Neil wanted some central rock bommies, which I was more than happy to help with.

I would use acrylic rods to thread the rock onto. Self-supporting narrow bommies mean better water circulation than rock walls and with less detritus build-up or dead spots. We bought some acrylic rods from a reef store, a masonry drill bit with a slightly larger diameter than the rods and in no time had created a bommie stretching the full height of the 60.9cm/24” tall tank.
We then poured all of the new saltwater into the new tank, topped up with enough old saltwater to fill the sump and get the system going, plugged in the new heater and return pump, checked the water and when it was it was up to temperature, moved over the fish and corals.
Yes the water was cloudy, as you might expect, but corals can deal with this and fish and corals were all fine when the water cleared the next day. The old tank was emptied, taken outside and the job done before Neil’s partner got home from work. I got Neil to buy some Spaghetti algae, Chaetomorpha spp, to place into the new sump chamber on the day of changeover. This I advised should be lit 24/7.
The equipment
Again we built up the new equipment over time, buying from wherever we could. Neil’s always felt a bit guilty about keeping marines so wanted some eco-credentials. I told him LED lighting would be a no brainer and fitted the tank with two TMC Aquaray LED tiles to light each of the bommies and four TMC Aquaray LED strips to provide additional light if needed. The effect is dramatic and striking, and the lack of light spill from the LEDs and the central bommies mean that you get a nice blue infinity effect from behind, aiding the feel of depth in the tank.
The lighting rig also means that Neil isn’t getting heat issues like he did with the old tank; they’re silent because they don’t use fans, they use less energy than his previous lights on a smaller tank, and their slim profiles mean that they don’t protrude past the outer line of the slim, open topped pelmet so the whole build looks really modern and clean.
Neil moved the circulation pumps across from the old tank, but within a few weeks it was obvious that they weren’t moving the water enough. On my advice, and after a talk-through the features, Neil replaced the pumps with two VorTech MP40esW from EcoTech Marine.

The result
Despite forking out a few thousand pounds on the new set-up in all, Neil loves his new tank. With its design and build, the simple methodology it’s running, plus the new lights and pumps, we managed to come up with a reef tank that will last another ten years and has bags of potential.
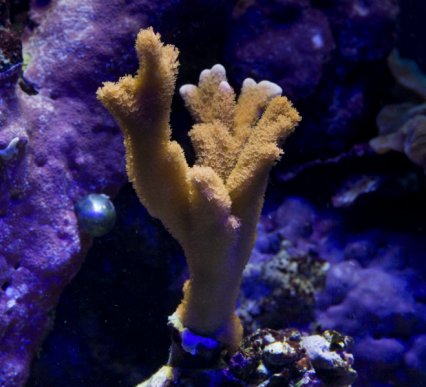
Being a keen gardener, Neil likes to buy small coral frags and nurture them over time, and the more spacious aquarium and its open aquascape will allow the corals to grow pretty big, without coming up against the confines of the tank walls. As the corals grow and increase in number the aquascape will look a lot better.
Would I have done anything differently in hindsight? Well, Neil doesn’t mind but that triangular corner weir is quite large, a little too large for my tastes. I’ve since bought and long-term tested the discrete Xinout pipe fittings from Italian company X-Aqua on my own tank; they do away with the need for a weir. For the price though, and considering the Xinout’s limited scavenging capabilities, I would still consider a nice black, rectangular corner weir for future projects, and I do still like my rimless tanks with nice chunky Optiwhite glass throughout.
I did set-up such a modern reef tank for myself not long after Neil’s, using the Zeovit method and I really liked it. So, if I had Neil’s tank now I’d run the full Zeovit, Zeolite and bacteria method with an automatic top-up, which is something I wouldn’t be without on any marine tank.
And finally, because the tank is in a lovely large dining room, there’s plenty of space to have opted for a 244 x 60.9 x 60.9cm/8 x 2 x 2’ tank, instead of the 121.9 x 60.9 x 60.9cm/4 x 2 x 2’!

Tank statistics
Tank size: 121.9 x 60.9 x 60.9cm/4 x 2 x 2' custom-built tank, sump and cabinet from Aquariums Ltd, which is no longer trading.
Sump: 91.4 x 45.7 x 45.7cm/3' x 18" x 18" with room for protein skimmer and algae refugium.
Lighting: 2 x AquaBeam 1000 Ultra Reef White and 4 x AquaBeam 500 LED strips on MMS mounting system.
Protein skimmer: Hydor Performer skimmer.
Return pump: Tunze Silence 1073.020.
Circulation pumps: 2 x VorTech MP40esW.
Filtration method: Berlin hybrid — live rock, protein skimmer and algae refugium.
Live rock: 30 kilos.
Chemical filtration: API Bio Chem Zorb (carbon) and Rowaphos phosphate remover.
How we created our reef tank step-by-step

1. Polystyrene goes down under the tank and the bulkhead fittings are connected and sealed with silicone.

2. Standpipes are in place, complete with Durso overflow method to reduce noise.

3. The sump is placed inside the cabinet, again on a layer of polystyrene to cushion it.

4. Ball valve and pipework are fitted under the tank. The ball valve reduces noise.

5. Existing live rock, fish and corals are placed in a black tub so that the old tank can be emptied and removed.

6. New bommie formation is created by threading rock onto an acrylic rod.

7. The bommie is lifted onto the rod and placed into the new tank, which is being filled at the same time.
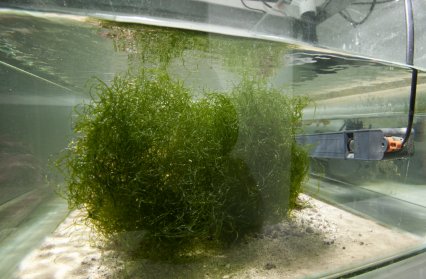
8. Chaetomorpha algae is placed into the algae refugium, along with some small live rock pieces and the old sand substrate.

9. A TMC GroBeam tile is fitted over the algae refugium in the sump, again using a rail system for support.
10. The tank is filled and fish and corals are moved over. The water is cloudy but parameters are stable and match the old tank.

11. The next day the tank is clear and the fish and corals start to make an appearance.
Why not take out a subscription to Practical Fishkeeping magazine? See our latest subscription offer.
Don't forget that PFK is now available to download on the iPad/iPhone.