


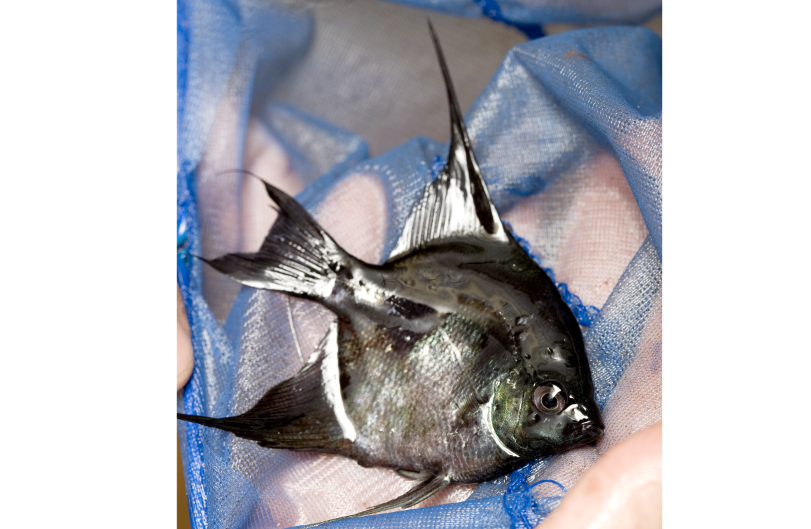
 Special care needs to be taken when catching Pictus catfish and other species with spines.
Whether moving home, selling to a friend, or rehousing fry, at some stage we all need to catch and transport fish. Here’s how to do it.
WORDS: NATHAN HILL
Transporting fish is a necessary evil of the hobby. It almost certainly stresses the fish. It stresses us as aquarists. On an industrial level, bad transportation can break a business. On a hobby level, it could result in losing your dream fish before you even get home.
With everything we’ll look at here, you’ll see a recurring theme — being prepared. Nine tenths of successful fish transport will come down to how prepared you and your equipment is. Plan in advance, and you’ll be able to factor in all sort of variables. Don’t leave everything until the last minute, for the sake of your fish.
Tip
Stop feeding your fish the day before transport! Empty bellies mean less waste, which will cause you fewer problems!
Use the right size of net for the fish you are trying to catch.
Nets — and how to use them!
Netting fish is an art unto itself. Retailers make it look easy (sometimes) because they do it day in and day out. They know the escape and evade techniques that individual species have and exploit them.
You won’t have this advantage, so you’ll need the most important catching tool there is — patience. Crashing around the tank will stress all the occupants. It’ll also risk breaking equipment like heaters. Worse still, if you’re armed with the wrong size net — or no net at all — it could all be stress for zero outcome.
Choose your nets to suit the job, and ideally invest in several sizes. Large nets of 25–30cm wide, for example, are good for scooping out large numbers of shoaling fish in a barren tank. Tiny nets of 5–7.5cm are only good for slow moving fry or shrimps. Using a big net in a small, decorated tank is as absurd as trying to catch Neons in a 1000 l tank with a tiny net.
For most ‘typical’ aquarium fish in the 2–10cm bracket, a net of around 15cm wide is optimal. It doesn’t drag like a big net but is still quite precise.
Get in the habit of using two nets at once. One net should be your sheep pen, while the other is the sheep dog. Keep the sheep pen net as still as possible, using the sheep dog net to coax the fish over to it, then when the fish is stuck between the two, close the gap and scoop it gently into one of the nets. Never use fast, striking motions — the risk of damage to the fish is high, and I promise you that the fish is more agile under water than you are.
Not all fish can be netted. Some, like Pictus catfish, will snag their barbed fins in the fabric. For fish like these, try using a couple of square, meshed planting pots — round pots are easier for them to dodge.
Lastly, use the fishes’ own retreats against them. Got a loach or catfish that likes to hide in a small cave? Let it hide when the net goes in, and then scoop out the whole cave, catfish and all.
Tip
When moving catfish or any fish with sharp spines, use sticky tape to give curved edges to the pointed corners of your bags. This will stop fish getting trapped in there and puncturing the bags.
Bags or tubs?
Just like catching fish, retailers make bag tying look effortless. It really isn’t. It’s an acquired skill and you likely won’t have it.
Bags are cheap and easy to store, which is why shops favour them, but using them isn’t a prerequisite to fish transport. Many fish fare badly in bags. Corydoras and other dumpy fish can get trapped in tapered corners, while fish with sharp spines may puncture them for sport.
There’s no shame in using a small bucket. Plastic ice cream tubs, thoroughly cleaned and rinsed, are ideal for moving many species, and only deep bodied fish like angelfish may struggle. Margarine tubs work well for tiny fish and fry, while a domestic bucket will be fine for large fish.
If using a bucket, make sure that it hasn’t been used to hold noxious materials — soaps, detergents or bleach. Ideally, use the same bucket you have dedicated for water changes.
If you are using a bag, the air to water ratio is critical. Water in a sealed bags runs out of oxygen quite quickly when fish are in it, and unless there’s a large amount of air nearby, it cannot replenish it.
NEVER fill a bag to the top with water and no air — your fish will suffocate en route. Try to fill the bag with no more than a third water, and fill the rest with normal, atmospheric air.
Sealing the bag can be tricky. Some aquarists favour tying a knot, while others use elastic bands to bind the top.
A wiley fishkeeper will look to use zip lock or self-binding freezer bags or sandwich bags but do note that these have a tendency to lay flat when set down, presenting the shallowest water to the fish inside. By all means use them (I do) but do have an extra person available to help keep them upright.
Getting the fish in the bag is the tricky bit. Where you can, roll the bag down (like rolling a sleeve) leaving just the bottom third unfurled. Dunk this part and fill it, and this air-filled ‘ring’ should now keep it afloat, while also keeping the bag aperture open.
It may seem obvious, but avoid novelty bags. ‘Poop’ bags for dogs are often scented (ergo toxic) and many bags burst as soon as even partly filled. Seeing as you’re planning moving fish in advance (right?), ask your retailer to sell you some of their bags. They’ll only ask a token fee, if at all, and you’ll have peace of mind that they are safe.
Cautionary note: Fish bags are a suffocation hazard to young children. Always store them well out of reach of little hands!

Did you know?
Corydoras catfish can exude a toxic mucous when distressed. In the confines of a bag, this mucous has been known to cause 100% fatalities, including the catfish that excreted it! Whenever bagging fish, separate them by species to minimise this risk.
On the move
When you’re ready to move your fish, wrap their bags, tubs or buckets in towels or tea towels to help retain heat. For a short journey, this is usually enough protection for an hour or so. For longer journeys, speak to your retailer about hiring or purchasing a polystyrene box with a lid.
On a car journey, think about where the fish will go first. Avoid the boot of the car where you can. On a summer’s day, it is likely to overheat, while in winter it will be chilly. If using a footwell, you’ll need to keep the bags upright. Use a box or bucket to keep things organised, and fill any empty space with more towels or inflated bags. The goal is to stop the bags from rolling around in the absence of someone to keep the bags stable and upright during the drive.
For just one or two bags, consider popping them on the passenger seat and securing them with the seatbelt.
Plan your route well in advance, and avoid any usual short cuts that involve sharp turns, winding roads, and speedbumps.

Ask your retailer in advance if they can demonstrate how to tie fish bags.

Only a third of the bag should be water — the rest needs to be air.


Use a battery powered airpump and some airline to inflate the bag, leaving several centimetres uninflated at the top.

Twist it several times, to make a ‘neck’ and either use elastic bands, or tie a knot to secure the air and water inside.

Double-bag for additional security and then wrap your bags in newspaper for extra insulation. Place them in a polystyrene box, with a towel or newspaper over them. Secure the lid, using tape to plug any draughts.
Big fish or heavily stocked tanks
For a large amount of fish, or a very large fish, over a short to medium journey, consider a watertight container (a polybox with a waterproof liner, or a large storage tub). Fill it to a third or halfway (for a large fish, ensure the water is deep enough to cover the fish entirely) and securely cover, but with spaces to allow air flow.
For the move, purchase a battery powered airpump, a length of airline, and an airstone (and batteries, of course). The extra aeration will help to gas out the build-up of carbon dioxide while the fish are in transit.

To avoid damage to a big, heavy Mbu puffer, a large net is covered with a sheet.

The fish is then gently coaxed into the net...

..and transferred into a prepared polybox half filled with tank water.

A battery airpump can be used to provide aeration during the move.
What if there are major delays?
If your fish are stuck in transit for unusually long spells — 12 hours or more, then you will face a water chemistry and water quality problem.
In the confines of the bag, and without filtration, the fish will excrete large amounts of ammonia that will accumulate. Normally, this would be highly toxic, but the other thing the fish are doing in that bag is respiring — releasing carbon dioxide.
The carbon dioxide has the effect of elevating carbonic acid in the water, lowering the pH. Because of the interaction between pH and ammonia, this means that the ammonia in the bag is in a less harmful ionic form known as ammonium.
That’s all well and good, right up until you open that bag up and flush the carbon dioxide out, turning the ammonium back into highly toxic ammonia in the process! After a long journey, fish can be wiped out in seconds by this one factor alone.

If you find yourself in this situation, you’ll need:
- A tub or small tank
- An acclimation kit (or at least 2m of airline, some suckers and an inline valve)
- A jug
- A test kit
- A thermometer
- Clean nets
- Zeolite or Seachem Prime
To acclimate your fish, you’ll need to know what you’re up against. Carefully open the bag, causing as little disturbance as possible and take a sample of water out to test. Test for ammonia and pH — when testing pH, be as gentle as possible mixing the solution with the water, as any vigorous shaking will drive out the CO2, pushing the pH back up and making the reading appear less acidic than the actual pH in the bag. Take the temperature of the bag water at this stage.
If you have the means then make up clean water of the exact pH and temperature of the water in the bag. Not everyone will have the facilities to do this, but if you do, then you can simply net the fish out of the bag and transfer them to this new water, before proceeding to the dripping stage.
For the rest of us, gently (really gently, like you’re defusing a bomb) transfer the fish in the bag water into the tub or small tank and put it on the floor in front of the destination tank.
If you have zeolite or Seachem Prime, add some to the container before adding the fish and water, as this will help to extract some of the ammonia.
Set up a length of airline with a flow valve in-line. Using a sucker, place one end of the airline into the tank, and start a syphon action so that it is sucking water from the tank.
Using the valve, reduce the flow to one drop per second and place the flowing end into the container with the fish. It is vital that the airline goes UNDER the water, and doesn’t cause splashing.
After around ten minutes of filling, gently jug out some water and increase the flow to two drops per second.
Ten minutes later, repeat and increase the flow to three drops per second.
Perform another water test and check the temperature. Gradually increase the flow rate, repeatedly removing the accumulated water.
Over time (it varies from setting to setting) the water will eventually come up to temperature and the ammonia will decrease while the pH will match that of the tank more closely.
When the temperature and pH are the same in both tank and container, you can net the fish and move them into the tank.
Take special care when catching some types of fish:

Fish with spines can become entangled in nets.

Always wear strong gauntlets if catching venomous fish to avoid being stung!

Fish with sharp teeth can chew through nets and bags in no time.
When you get to the other end
After a short to medium journey, fish in bags will need floating on the surface of their destination tanks, to allow temperatures to equalise out. You may need to remove some water from the tank first to avoid an overspill!

Turn the lights off in the aquarium. Next, float the bags on top of the tank, sealed, for around 20 minutes.

Open up the fish bags and roll them down, so that the top of the bag forms a floating ring.

Now add a small cup of water from the tank to the bag and leave it for five minutes. Repeat this two or three times at five minute intervals.

Transfer the fish to the tank by netting them out of the bag... this avoids adding the waste products in the bag water to the aquarium. Once the fish are in the tank, you can dispose of the bags and the transport water.